Saturday, September 24, 2016

GIT vs SVN

GIT vs SVN

In the DevOps world, selection of right SCM tool is a significant decision. Since these tools are kind of driving force behind the process, a wrong SCM selection may lead to inefficiencies throughout your delivery pipeline. I personally have used CVS and SVN in most part of my career. Those projects were not really Agile projects. While we had some kind of CI and CD, there were no end to end DevOps process in place. So we were able live with it.

Recently I started using GIT - both private GIT as well as public GITHUB and BIT BUCKET.  Also in the recent assignments, we don't just go with what is provided by customer. We demanded the right SCM. We study the customer needs and recommend centralized or distributed SCM. 

In this blog, I will  compare the capabilities of GIT and SVN at very basic level. This blog does not cover the detailed scenarios like when GIT performs better over SVN and vice versa or how GIT's way of working on the content instead of file helps in some large assignments.


S. No GIT SVN
1 Distributed Source Control -
  • Developers can work offline on their local repository and keep committing so that they can do back to the earlier version if something goes wrong.
  • Once they are online, they can push the changes to the master repository. So consistent code in Master repository.
  • If any repository is lost due to system failure only the changes which were unique to that repository are lost. If users frequently push and fetch changes with each other this tends to be a small amount of loss, if any.
  • GIT supports single repository too.
Centralized Repository -
  • You cannot have offline repository in your laptop. So the developers has to be connected to SVN to commit and working offline is not easy.
  • Loss of central repository needs recovery from backup and changes since that last backup are likely to be lost (Many man days of effort)
  • Advantage of Single repository is that  there is little doubt about where something is stored.
2 Performance - Extremely fast  since all operations (except for push and fetch) are local there is no network latency involved  Performance - Slow Compared to GIT as all the file history and version info is present centrally
3 Storage/Space Requirements - Git repositories are much smaller in file size than Subversion repositories Storage/Space Requirements - May need more space than GIT
3 Branching and merging support is a lot better. Git provides better auditing of branch and merge events Branching and merging is good for small projects
4 Usability - Bit complex than SVN
  • For newbies, need some additional learning as it is different from SVN.
  • Also more concepts and more commands. The developers need to understand when to use checkout vs clone; commit vs push
Usability - Simple to use because
  • Very limited concepts and commands
  • Every revision is numbered sequentially and it is easy to walk through
  • Better client GUI tools
5 Access Control - Due to being distributed, you inherently do not have to give commit access to other people in order for them to use the versioning features. Instead, you decide when to merge what from whom.  Access Control - Because the repository is centralized and every developers needs commit access, it is really difficult to have repository owner.

Saturday, September 17, 2016

Mockito setup in Spring application

Mockito is used widely for application code Unit Testing. In this blog I will show the dependencies which are required to configure Mockito in Spring Web application.

In the existing Spring based application, following dependent jar files needs to be added.

  • asm-1.0.2.jar
  • hamcrest-all-1.3.jar
  • json-path-1.2.0.jar
  • json-smart-2.1.0.jar
  • junit-4.11.jar
  • mockito-core-1.9.5.jar
  • objenesis-2.1.jar

after adding these jar file you are all set to start writing the Mockito based JUnit test cases.

Few of the useful plugin for Eclipse IDE that will help in analyzing code coverage can be installed. The plugin which I used for code coverage is "EclEmma".

This can be installed from Eclipse market place which gives report on percentage of code line which has been covered by Unit Testing. 

In subsequent blogs i will show some sample Mockito Unit Test cases classes.

Friday, September 16, 2016

Use Swagger UI for showing interactive API documentation

Following Swagger post I showed how to configure Swagger with Spring project. In this blog I will demonstrate using Swagger UI for showing interactive documentation.

Swagger UI is part of the Swagger project and it allows you to generate, visualize and consume API. It is package which basically consist of html, css and javascript, and parses the json output generated from application code scanning. This scanning and configuration was explained in following post.


Swagger UI Setup can be downloaded from "here".


Copy the files to a Dynamic Web project in eclipse and paste the content from "dist" folder to WebContent as shown below.


Here I am using tomcat server to host this UI application. By doing so it will be easy to share the API application with other user. It shows following UI. 


Please note that by default swagger will load the petstore Api details. I will cover customizing them in next point. 


Swagger UI presents very nice interactive tool, using which users can read the documentation, can see the exposed API, detailed input and output parameter, also they can test the API real time. This tool present by parsing the json output which was generated while scanning the API project. 


Above UI shows all the available API exposed in petstore application, method type supported and some basic details at top level. 

You can see entire API details after expanding the service  by clicking on the link. 
Below "/store/inventory" API has been expanded and you can see description of this API, what is response code returned when successful, at the last of the section you can see "Try it Out!" button, using which you can test the API. 

Response from the API will be shown in the same section below the button.


By default Swagger UI shows details pet store API, now if you want your custom build API to be listed, then few changes needs to be done in the above setup. Below I am going to explain the steps which needs to be done to customize the output.

  • Ensure that application is completed with the swagger setup and json output is accessible when you access following url, "http://localhost:9081/SpringSwaggerDemo/v2/api-docs", this is the url for the sample api application  which i created, you need to change it as per your setup, but last part of URL remain same i.e. "/v2/api-docs".
  • To load api documentation in the Swagger UI enter the above url in test field provided in top header section and press on "Explore" button.
  • Application will parse json and it will display the content in below section. This temporary loads you custom API details.
  • This url change will not be persisted in the UI code if you refresh the page it will be lost, so to persist the url change you need to modify the script code as shown below.
  • Locate index.html file, open with editor do following changes. modify the url value to you API url as shown below. After this change launch the UI again, you will see by default application loads the API details.
  var url = window.location.search.match(/url=([^&]+)/);
  if (url && url.length > 1) {
     url = decodeURIComponent(url[1]);
  } else {
      //url = "http://petstore.swagger.io/v2/swagger.json"; // change this value to your API json url. 
      url="http://localhost:9081/SpringSwaggerDemo/v2/api-docs";
  }
  • Check below UI where it shows the custom API details.


  • Next I will explain some more customization's related to language and UI.
  • Different Language support.
    • Swagger support showing UI menu in different languages. To enable this change index.html file needs to be modified and you need to add following script files. These files comes with the package which you downloaded. Locate "lang" folder inside the project, you will find different language files which by default comes with package. If you need to enable French language, so following code needs to be added in the index.html file. 
  <script src="lang/translator.js" type="text/javascript"></script>
  <script src="lang/fr.js" type="text/javascript"></script>
    • By default basic menu and other controls of Swagger UI will be converted to french language. Incase you have any other language for which file is not present then you need to create that file and place it inside this folder and include it in the html file.
  • UI Customization
    • Swagger UI can be customized and configured as per the organization and individual needs and requirements.
    • Entire source code is provided, so any modification can be easily done. Generally following are the section in UI which needs to be modified like Header, Logo, Color theme, etc.
    • To change the logo change the images inside "img" folder.
    • To apply new css, modify the css or override by putting new css file which extends the style provided by swagger.
    • To modify parsing logic and other logic modify js file inside lib folder.
    • Below is one sample changes to UI I have done. You can see the difference between above UI and the modified UI.


I hope this will be helpful post for people looking to use swagger as API documentation tool using Swagger UI. This post will help you kick starting the process.


Share your feedback.


Thursday, September 15, 2016

Reading log file path from environment Variable in logback

In this short blog i will be showing how to read the log folder location from environment variable.

In general log path for an application is one time configuration. So why to keep multiple property files for each environments. Better approach could be using environment variable on server, which can be configured once.

Here i am using Tomcat 7.x as a server. For Logback using following jars.

  • logback-classic-1.1.3.jar
  • logback-core-1.1.3.jar

First lets start by creating environment variable in tomcat server. For this you need to open context.xml file located at TOMCAT_HOME/conf folder. Open with text editor and add following line in the file.

  <Environment name="LOG_PATH" type="java.lang.String" value="/logs"/>

you are done with creation of environment variable which will be accessible via jndi lookup.

next will be open logback.xml file which contains application logging configurations.

Use JNDI lookup to retrieve the environment variable. Logback provides a tag "insertFromJNDI" which has attributes like "env-entry-name" and "as".

"env-entry-name" - in this attribute, jndi lookup path needs to be mentioned. e.g.

env-entry-name="java:comp/env/LOG_PATH"

"as" - in this attribute,variable will be created where the value returned from lookup will be stored.

<insertFromJNDI env-entry-name="java:comp/env/LOG_PATH" as="LOG_PATH" />

 Assign this variable to Context and then access it via "${CONTEXT_NAME}". shown below.

<contextName>${LOG_PATH}</contextName>

Complete configuration code is given below.


<?xml version="1.0" encoding="UTF-8"?>
<!DOCTYPE xml>
<configuration>
 <insertFromJNDI env-entry-name="java:comp/env/LOG_PATH" as="LOG_PATH" />
   <contextName>${LOG_PATH}</contextName>
 <appender name="SAMPLE-DEBUG"
  class="ch.qos.logback.core.rolling.RollingFileAppender">
  <file>${CONTEXT_NAME}/debug.log</file>
  <filter class="ch.qos.logback.classic.filter.LevelFilter">
   <level>debug</level>
   <onMatch>ACCEPT</onMatch>
   <onMismatch>DENY</onMismatch>
  </filter>
  <encoder class="ch.qos.logback.classic.encoder.PatternLayoutEncoder">
   <Pattern>
    %d{yyyy-dd-MM HH:mm:ss.SSS} [%thread] %-5level %logger{36} - %msg%n
   </Pattern>
  </encoder>
  <rollingPolicy class="ch.qos.logback.core.rolling.TimeBasedRollingPolicy">
   <fileNamePattern>${CONTEXT_NAME}/archived/debug.%d{yyyy-dd-MM}.%i.log</fileNamePattern>
   <timeBasedFileNamingAndTriggeringPolicy
    class="ch.qos.logback.core.rolling.SizeAndTimeBasedFNATP">
    <maxFileSize>2MB</maxFileSize>
   </timeBasedFileNamingAndTriggeringPolicy>
  </rollingPolicy>
 </appender>
 <root level="DEBUG">
  <appender-ref ref="SAMPLE-DEBUG"  />
 </root>
</configuration>

share your feedback. 

Monday, September 12, 2016

Swagger API doc for Spring Based Webservices

When any API is created one of the major challenge is to create documentation, also once documentation is created then updating it over the period of time for any changes which are done in API.

In this blog I will be demonstrating how to create API documentation for REST webservices using Swagger tool.

Swagger is very mature API doc creation tools. It provides interactive documentation with very good ecosystem like Swagger UI, Swagger Editor.
Swagger is intelligent enough to scan through the code automatically and it generates am output which are easily readable by human and even system.

In this blog i will be showing swagger integration with Spring based rest webservices(bottom up).

Prerequisite for this blog is that you have Spring API project created and working.
  • To start first download following jar files and add them in your project.
  1. aopalliance-1.0.jar
  2. aspectjrt-1.8.6.jar
  3. aspectjweaver-1.8.6.jar
  4. classmate-1.2.0.jar
  5. guava-18.0.jar
  6. mapstruct-1.0.0.CR1.jar
  7. spring-hateoas-0.18.0.RELEASE.jar
  8. spring-plugin-core-1.2.0.RELEASE.jar
  9. spring-plugin-metadata-1.2.0.RELEASE.jar
  10. springfox-core-2.2.2.jar
  11. springfox-schema-2.2.2.jar
  12. springfox-spi-2.2.2.jar
  13. springfox-spring-web-2.2.2.jar
  14. springfox-swagger-common-2.2.2.jar
  15. springfox-swagger2-2.2.2.jar
  16. swagger-annotations-1.5.3.jar
  17. swagger-models-1.5.3.jar
  • Next will be to add Swagger Config java file, this is the file which is responsible for loading swagger config, specifying the url which needs to be scanned, basic API details.
Here is the sample code.
package com.swagger.apidoc;

import static com.google.common.base.Predicates.or;
import static springfox.documentation.builders.PathSelectors.regex;

import org.springframework.context.annotation.Bean;
import org.springframework.context.annotation.Configuration;

import com.google.common.base.Predicate;

import springfox.documentation.builders.RequestHandlerSelectors;
import springfox.documentation.service.ApiInfo;
import springfox.documentation.spi.DocumentationType;
import springfox.documentation.spring.web.plugins.Docket;
import springfox.documentation.swagger2.annotations.EnableSwagger2;

@Configuration
@EnableSwagger2
public class SwaggerConfig {
 @Bean
 public Docket api() {
  return new Docket(DocumentationType.SWAGGER_2).select()
    .apis(RequestHandlerSelectors.any())
    .paths(paths())
    .build()
    .apiInfo(getApiInfo());
 }
 private ApiInfo getApiInfo() {
  ApiInfo apiInfo = new ApiInfo("Swagger Demo API details",
    "These are API is demonstration of Swagger integration with spring","1.0", "TOS", 
           "abcd@test.com","@Swagger Demo", "http://java-treat.blogspot.com");
  return apiInfo;
 }
 private Predicate paths() {
  Predicate filter  = or(regex("/api.*")); // apiurl which starts with /api will be scanned by swagger.
  return filter;
 }
}

  • Above code will scan through following controller class present in the project.
package com.swagger.controller;

import java.io.IOException;

import org.apache.http.client.ClientProtocolException;
import org.slf4j.Logger;
import org.slf4j.LoggerFactory;
import org.springframework.beans.factory.annotation.Autowired;
import org.springframework.http.HttpStatus;
import org.springframework.http.ResponseEntity;
import org.springframework.stereotype.Controller;
import org.springframework.util.StringUtils;
import org.springframework.web.bind.annotation.PathVariable;
import org.springframework.web.bind.annotation.RequestMapping;
import org.springframework.web.bind.annotation.RequestMethod;
import org.springframework.web.bind.annotation.ResponseBody;
import org.springframework.web.servlet.ModelAndView;

import com.swagger.bean.Response;
import com.swagger.exception.CustomTwitterException;
import com.swagger.service.PostService;

import oauth.signpost.exception.OAuthCommunicationException;
import oauth.signpost.exception.OAuthExpectationFailedException;
import oauth.signpost.exception.OAuthMessageSignerException;

@RequestMapping(value="/api")
@Controller
public class ApiController {

 private static final Logger LOGGER = LoggerFactory.getLogger(ApiController.class);

 @Autowired
 PostService demoService;

 @RequestMapping(value = "/demo/{clientId}", method = RequestMethod.GET)
 public @ResponseBody
 ResponseEntity demoMethod(@PathVariable String clientId) throws OAuthMessageSignerException,
   OAuthExpectationFailedException, OAuthCommunicationException, ClientProtocolException, IOException,
   CustomTwitterException {
  LOGGER.debug("START: ----- demoMethod [GET] method");
  ResponseEntity entity = null;
  Response resp = null;
  if (!StringUtils.isEmpty(clientId)) {
   resp = demoService.postMessageSelf(clientId);
   entity = new ResponseEntity(resp, resp.getStatus());
  } else {
   resp = new Response();
   resp.setCode("ERR404");
   resp.setMessage("System Error occurred: Invalid parameter passed, correct 
                                         the input parameter and retry");
   resp.setDeveloperMessage("System Error occurred: Invalid parameter passed, 
                                         correct the input parameter and retry");
   resp.setStatus(HttpStatus.UNAUTHORIZED);
   resp.setProcessedCount("0");
   resp.setReceivedCount("0");
   entity = new ResponseEntity(resp, resp.getStatus());
   LOGGER.debug(
   "postMessage method: Invalid parameter is passed during posting message operation,
                         throwing back error to caller {} ",
    entity.toString());
  }
  LOGGER.debug("END: ----- demoMethod [GET] method");
  return entity;
 }
 @RequestMapping(value = "/test", method = RequestMethod.GET)
 public ModelAndView demoMethod1(@PathVariable String clientId) {
  ModelAndView mdv=new ModelAndView();
  mdv.setViewName("ppTesting");
  return mdv;
 }
}
  • I have custom response class, sample for same is given below.

package com.swagger.bean;

import java.io.Serializable;

import javax.xml.bind.annotation.XmlRootElement;

import com.fasterxml.jackson.annotation.JsonIgnoreProperties;
@XmlRootElement
@JsonIgnoreProperties(value={"throwable"})
public class Response implements Serializable{
 String message;
 String code;
 String receivedCount;
 String processedCount;
 public Response(){
  this.code = null;
  this.message = null;
  this.receivedCount=null;
  this.processedCount=null;
 }
 public String getMessage() {
  return message;
 }
 public void setMessage(String message) {
  this.message = message;
 }
 public String getCode() {
  return code;
 }
 public void setCode(String code) {
  this.code = code;
 }
 public String getReceivedCount() {
  return receivedCount;
 }
 public void setReceivedCount(String receivedCount) {
  this.receivedCount = receivedCount;
 }
 public String getProcessedCount() {
  return processedCount;
 }
 public void setProcessedCount(String processedCount) {
  this.processedCount = processedCount;
 }
}
  • Once above step has been completed, next start the server. Swagger API will scan the packages and it will generate the necessary json documentation. 
  • This json documentation can be parsed and documentation can be generated. In next blog i will show how to use Swagger provided UI, which does the parsing of the json output and displays in nice look and feel UI.
  • To access the generated json file, access following url, and you should see something as shown below.
  • URL: http://<hostname>:<port>/SpringSwaggerDemo/v2/api-docs
  • For my demo context root of the application was "SpringSwaggerDemo", 
  • Below is the sample json output file.

In future blogs I will show different annotations which are available which can be used for more customized documentation and also configure Swagger with Jersey based api projects, using and configuring Swagger UI.

Friday, September 9, 2016

Setup Ubuntu Virtual Machine on Windows

In this blog i will be showing how to configure Virtual machine in windows machine. In this blog i will show the demo using Virtual Box which is an open source tool, and it can be freely downloadable from Virtual Box .

  • Download the "VirtualBox-5.1.4-110228-Win" installer from above link.
  • Download "Ubuntu" OS.
  • Ensure that you have sufficient disk space and decent RAM, as VM needs use from the available resources.
  • Double click on the installer , and follow the wizard steps. Below is combined screenshot of installation steps.
Virtual box installation steps screenshot

  • After installation is complete, start virtual box application. 
  • Before we go further ensure that you downloaded Ubuntu OS from the link mentioned above.
  • Ubuntu setup will be required while creating Virtual Machine. There are various OS supported, you can see that while setting up.
  • Start the Virtual Box application, click on New menu, and select following in the popup
                     1. Name: Give name for your VM
                     2. Type: Linux
                     3. Version: Ubuntu (64 bit), for 64 bit version of Ubuntu, otherwise 32.


  • In next two steps you will specify the RAM for the VM, higher is the better, but based on your system capacity provide the value. Also select Create a Virtual Hard Disk now option in the last screen. As shown below. Then click on Create button.

  • Specify dis related information as shown below in sequence of wizard popup.


  • This is how it looks when VM creation is done.
 

  • Next step will be setup ubuntu OS. Right click on the Ubuntu VM in above screen and click on Settings. Go to "Storage" in the popup and on the right pan select "Empty" and click on Disk icon and select the drive where your Ubuntu installer is kept. Select the installer in file selection popup and Click Ok on below popup.
 
  • Right click on the VM Ubuntu, and click on start. This will initiate Installation of Ubuntu OS in the VM.


  • Ubuntu installation will start and following screens will be shown, follow the installation wizard. and complete the installation.


  •  Now the OS in VM installation is complete. and it can be used for any setup which you have plan to use

SSO on Windows using Waffle - Java Web Application

Waffle is open source API which helps in windows based authentication. If project requirements is to auto login a user with Windows login credentials then Waffle provides one option to achieve the same.

Waffle supports Negotiate, NTLM and Kerberos. In this blog I will create a Java Web Project to demonstrate how to get the windows logged in credentials using Waffle.

Prerequisites:
  1. Tomcat
  2. Eclipse
  • Create a new Dynamic Web Project in eclipse. 
Create Dynamic Web Project

  • Add following jar files related to Waffle setup.
  1. commons-logging-1.1.1.jar
  2. guava-r07.jar
  3. jna.jar
  4. platform.jar
  5. waffle-jna.jar
  • Next step will be to add the filter classes to handle SSO with windows. 
Add filter class "waffle.servlet.NegotiateSecurityFilter", this class takes care of doing negotiation with windows system by invoking necessary classes with in the waffle jars. 
  • Sample code for the same is given below for web,xml file.
<?xml version="1.0" encoding="UTF-8"?>
<web-app xmlns:xsi="http://www.w3.org/2001/XMLSchema-instance"
 xmlns="http://java.sun.com/xml/ns/javaee"
 xsi:schemaLocation="http://java.sun.com/xml/ns/javaee http://java.sun.com/xml/ns/javaee/web-app_3_0.xsd"
 id="WebApp_ID" version="3.0">
 <display-name>WaffleDemo</display-name>
 <filter>
  <filter-name>SecurityFilter</filter-name>
  <filter-class>waffle.servlet.NegotiateSecurityFilter</filter-class>
 </filter>
 <filter-mapping>
  <filter-name>SecurityFilter</filter-name>
  <url-pattern>/*</url-pattern>
 </filter-mapping>
</web-app>
  • This filter class takes several init-params, which can be added to customize the default behavior of the filter class. I will explain few of them below.
  1. allowGuestLogin - if this flag is set to true, Waffle will allow any guest user will also be authenticated and waffle will return true. This will allow all the user to access the application. This flag will be useful if you have requirement to allow guest user as well to login to app with some minimal access.
  2. waffle.servlet.spi.NegotiateSecurityFilterProvider/protocols -  Here list of supported security protocol can be passed. like Negotiate, NTLM.
  3. principalFormat: Specifies the name format for the principal.
  4. roleFormat: Specifies the name format for the role.
  • Next step will to add code in servlet to retrieve the user details.

request.getRemoteUser() // for getting the user name.
session.getId();// will print the user session id.
request.getUserPrincipal().getName()  // this to get user name.

  • now deploy the application on server and access the url, you should be able to see the user details.
  • Now next step will be based on project need, if any local authorization needs to be implemented then you need custom implementation. Otherwise you are good to go.


Thursday, September 8, 2016

Handling Cross site Scripting

Typically in web application cross site scripting issue is one of the most occurring issues. Cross site scripting vulnerability occurs when hackers are able to execute script code in your application. This can happen due exploiting weakness in the application code.
Like
  1. Trusting data which comes from any of the system.
  2. Lack of data filter for data cleansing before data goes inside the system.
  3. Use of Scriptlet  <%=%> for printing data in JSP without validating the data.
CSS can broadly be categorized in two subsections.
  • If hackers are able to persist their malicious code in application persistence layer (DB), and whenever any application user visits the web page, these malicious code gets executed and hacker will be able to exploit user. This type is persistent and are more dangerous.
         Hacker can add dynamic redirection to some of his malicious site, and capture confidential data. As this redirection happened from the parent site user also will not doubt and can provide their confidential data.
  • Runtime execution of malicious code where Hacker can execute these script code by passing them from UI on the runtime. These are non-persistent types.
Generally if this vulnerability is present in the application, application developer or lead should not target specific fixes where these issues are identified.They need to fix the issue application wide a individual fixes will not make entire application free from CSS. 

Following are the points which needs to be taken care.

The data needs to be sanitized at the entry point only so that application never receives data which is malicious. 

In Java this can be handled by adding Filter which sanitizes all the request which is coming from Web. 
Note: This only sanitizes the data which is coming from Web, if you have different source of data like Feed file, Materialized views, direct DB updates, reading data from Webservice calls. They need to be also taken care of. These are out of scope for this blog.

Creating filter, The main purpose of this filter class is to encode/escape the value which has tags in it. Plain string and other value will be kept as is. By escaping these characters will make them dumb and browser will not execute them as script tags or predefined html tags.

 first step is to Create a Request Wrapper class which is responsible for encoding the values. This class will extend "javax.servlet.http.HttpServletRequestWrapper" class which provides method such as "getParemeter", "getParemeterValues", in these methods only escaping logic needs to be added.

Below is the sample code

import javax.servlet.http.HttpServletRequest;
import javax.servlet.http.HttpServletRequestWrapper;

import org.apache.commons.lang.StringEscapeUtils;

public class XssReqWrapper extends HttpServletRequestWrapper {

 public XssReqWrapper(HttpServletRequest request) {
  super(request);
 }

 @Override
 public String getParameter(String name) {
  if (name != null) {
   String values = super.getParameter(name);
   String newValues = StringEscapeUtils.escapeHtml(values);
   return newValues;
  }
  return super.getParameter(name);
 }

 @Override
 public String[] getParameterValues(String name) {
  if (name != null) {
   String[] values = super.getParameterValues(name);
   if (values != null) {
    String[] encodedValues = new String[values.length];
    for (int i = 0; i < values.length; ++i) {
     encodedValues[i] = StringEscapeUtils.escapeHtml(values[i]);
    }
    return encodedValues;
   }
  }
  return null;
 }
}
Here i am using class from "org.apache.commons.lang.StringEscapeUtils" to escape the characters. For this you need add "commons-lang-2.6.jar" file.
Create a Filter Class which implements "javax.servlet.Filter", and override the methods doFilter, destroy, init. In this example I will using only doFilter method, as that is the method which will have escaping logic for tags. Below is the sample code
import java.io.IOException;

import javax.servlet.Filter;
import javax.servlet.FilterChain;
import javax.servlet.FilterConfig;
import javax.servlet.ServletException;
import javax.servlet.ServletRequest;
import javax.servlet.ServletResponse;
import javax.servlet.http.HttpServletRequest;

public class XssFilter implements Filter {
 @Override
 public void destroy() {
  //left intentionally empty
 }

 @Override
 public void doFilter(ServletRequest req, ServletResponse res, FilterChain chain)
   throws IOException, ServletException {
  HttpServletRequest httpReq=(HttpServletRequest) req;
  chain.doFilter(new XssReqWrapper(httpReq), res);
 }

 @Override
 public void init(FilterConfig config) throws ServletException {
  //left intentionally empty
 }
}
Once above classes are created, Open Web.xml file. and add following line of code. This will enable the filter in the web application. And for each and every request this filter will be called.
<filter>
 <filter-name>xssFilter</filter-name>
 <filter-class>com.xss.sample.XssFilter</filter-class>
</filter>
<filter-mapping>
 <filter-name>xssFilter</filter-name>
 <url-pattern>/*</url-pattern>
</filter-mapping>
Below is demo where i will show behavior of application without filter and with filter.

Application without XssFilter.

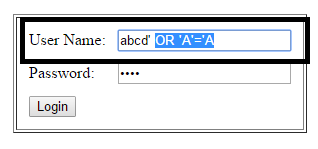
Below is login page where i will submit page with "<script> alert('Hello')</script>" as a user name.


Once this page is submitted to server it does simple forward to another page where i am printing the user name. See below what happens. Here browser interprets the script tag as a valid tags and executed it while loading the page. This is where hackers can redirect user to some malicious page and capture some information from them.

Also see the console output of the value.


Application with XssFilter.


I will pass exact same value as shown in the above login page. But in the subsequent page, now browser does not show any alert. It treats it as normal value and display it in the UI.


Also see the changes which filter makes with the submitted value. Check console logs.


Here Filter class encodes the "<" and ">" values to "&lt;" and "&gt;", which browser treats as normal string and display the value.

That is all from Cross Site scripting, i will cover some other Security Vulnerabilities in upcoming post.

Wednesday, September 7, 2016

SQL Injection security Vulnerability

This article i will be covering SQL Injection security vulnerability.

What is SQL Injection?
SQL Injection means, modifying application query in such a way that it tweaks the actual query results. With this issue present in application Hacker can easily manipulate the query and can gain access to application data and functionality.

How to address this issue?
There are many things which application developer can take care during the development phase which can avoid these issues.

  1. Usage of PreparedStatement while doing database operations.
  2. Usage of CallableStatement which is used to call database Procedures. 
  3. Input validations and Data Encoding.
  4. Database related constraints like, usage of proper grant, privilege, views etc.   
Below is simple example on how the attacker can use this vulnerability to exploit system.

Lets assume that in the web application there is login screen which prompts user to enter user credentials. 

In the application to validate the user following query is used.
SELECT USERNAME FROM USER WHERE PASSWORD='ABCD' AND USERNAME='ABCD' ;

and in java code this query is prepared using string concatenation operation something like shown below.
public String validateUser(String userName, String password){
 Statement stmt=null;
 String query="SELECT USERNAME FROM USER WHERE PASSWORD='"+password+"' AND USERNAME='"+userName+"'";
 stmt=con.createStatement();
 ResultSet res= stmt.executeQuery(query);

}
Now to exploit this limitation in the code,hacker can easily manipulate the query by passing additional query while login from the application login page and he can access the application without having valid user account. This can be done as shown below.


Application will receive the information from UI and it will prepare following query based on above java code.
SELECT USERNAME FROM USER WHERE PASSWORD='ABCD' AND USERNAME='abcd' OR 'A'='A' ;

Once above query is executed by database, even if the hacker enters the wrong user name and password, he is able to get into the system, as the condition "OR 'A"='A"" always returns true. This value hacker passed from UI and application blindly accepts this value and prepares the query.

This is one of the kind of exploitation which hacker can do if application is vulnerable to SQL Injection.

to address this issue one of the simple solution is to migrate to PreparedStatement. But there are situations where this migration is not very straight forward when application team doesnot want to modify legacy codes. Then other approaches can be taken up like escaping/encoding the user input and append those value in sql queries.

Prepared Statement Approach:
Below is the sample code which will remove the SQL injection issue. There are ORM framework available which can be used in the application and these framework takes care of all these standards. like, MyBatis, Hibernate, Spring DAO etc.
public String validateUser(String userName, String password){
 String query="SELECT USERNAME FROM USER WHERE PASSWORD=? AND USERNAME=?";
 PreparedStatement stmt=connection.prepareStatement(query);
 stmt.setString(1,password);
 stmt.setString(2,userName);
 ResultSet res= stmt.executeQuery();
}
I hope this explanation helps to understand the SQL injection issue.


Parallel AJAX calls


Consider a scenarios where you have multiple source of data and that needs to be consolidated in the UI and presented to the users. There can be different ways to implement this. One option can be using AJAX approach. JQuery provides a way to initiate parallel AJAX calls. In this blog i will be showing a sample code to achieve same.

Using Jquery provided "$.when" function, which provides a way of executing asynchronous events. $.when takes asynchronous ajax events as a parameter, and the output of these AJAX events will return in ".then" in the same order.

$.when(ajax1, ajax2,....).then(resp1,resp2,....);


Following is the sample code to make parallel ajax call.
var url1="http://localhost:8080/url1";
var url2="http://localhost:8080/url2";
var param="s=abcd";

$.when(
 $.ajax({timeout:10000,error:function(){handleErrorScenario();},type: "get",
   url:url1, async : true, data:param}),
     $.ajax({timeout:10000,error:function(){handleErrorScenario();},type: "get",url:url2,
   cache: true,async : true, data:param})
 )
 .then(function(url1Resp, url2Resp){
    
 if(!url1Resp || !url2Resp){
  handleErrorScenario();//define this function.
 }else{
  handleSuccessScenario(url1Resp, url2Resp); //define this function.
 }
}

In the above sample there are two AJAX function which are passed as parameter. url1Resp and url2Resp will hold the output from the call. Code inside ".then" will be only executed when all the deferred AJAX response comes back. Some of the function needs to be defined in the your code. I am using them as dummy reference.

Monday, September 5, 2016

Using Apache CXF initiate SOAP call

IN this blog i will be showing how to consume SOAP webservice in java by generating Client code using Apache CXF.

Prerequisites for this blog are as follows.
  1. Eclipse Mars
  2. Java
  3. Apache CXF
  4. WSDL file for any SOAP webservice.
Install CXF

Apache CXF can be downloaded from "CXF". After downloading setup, unzip it in your system. 

Configure cxf in eclipse. 

Go to Windows - Preferences - Webservice - CXF 2.0 Preferences

Then select CXF Runtime - click on Add - Specify CSF installed location - Click on Finish.

I have highlighted the steps with blocks in below screen shot.

Setting Up CXF in Eclipse

Create Web Project or Paste WSDL in existing project.

After configuring you need create Project in eclipse, or if you are using it in existing project then paste the WSDL file which you have received from service provider.

Next step will be to generate the client code

Right click on wsdl file, Go to - Webservice - Generate Client

Webservice Client popup will come, next specify the Configuration by clicking on the "Webservice runtime" link. In the Client configuration popup select "Apache CXF 2.x". Click OK.

Click next button, specify the package incase it needs to be changed. Otherwise keep everything default and finish the steps.

Steps to create Client Code

Once the client code
is generate. Following are the important note, which will help you in quick startup.
  •  Locate file which has name with *_Client.java. This is sample client code which is generated by CXF. This shows invocation steps.
  • Locate file which extends "javax.xml.ws.Service", this is the main service class which will be utilized in invoking the service.


  GlobalWeather ss = new GlobalWeather();
  GlobalWeatherSoap port = ss.getGlobalWeatherSoap();  
  java.lang.String _getCitiesByCountry__return = port.getCitiesByCountry("Country Name");
  System.out.println("getCitiesByCountry.result=" + _getCitiesByCountry__return);
Incase you need to override the end point url, following code can be used to override the end point url.
  GlobalWeather ss = new GlobalWeather();
  GlobalWeatherSoap port = ss.getGlobalWeatherSoap();  
 
//code to override the end point
  BindingProvider bp = (BindingProvider) port;
  bp.getRequestContext().put(BindingProvider.ENDPOINT_ADDRESS_PROPERTY,
    "NEW URL");

  java.lang.String _getCitiesByCountry__return = port.getCitiesByCountry("Country Name");
  System.out.println("getCitiesByCountry.result=" + _getCitiesByCountry__return);

Saturday, September 3, 2016

Cross domain Calls in AJAX with Jsonp

Web browser doesnot allow initiating cross domain call from javascript. There are multiple ways to initiate cross domain calls, I will be showing example on how to make cross domain call from javascript using jsonp.


Using Jquery following is the way to initiate Cross Domain call.

in $.ajax method, "dataType" parameter should be set to "jsonp", here jsonp means Json with padding, with jsonp a javascript code
is injected in client browser, which enables code to make cross domain call.


function initiateCrossDomainCall(url) {
 $.ajax({
     dataType: 'jsonp', // json with padding
     type:"GET",
            url : url,
            success: function ( data) {
             parseResp(data);
            },
     error: function ( data, status, error) {
  parseErrorResp(data, status, error)
     },
            timeout: 2000
  });
}
function parseResp(data){
 //add code to parse responsedata.
}
function parseErrorResp(data, status, error){
 // parse errr response.
}

Basically when above javascript call is initiated from client, and dataType is mentioned as JSONP, then jquery by default adds a parameter to the url. parameter name will be "callback" and name of the method will dynamically generated by jquery. Server response should be wrapped inside this method.. e.g. in the below url call, you can see the callback=jQuery11230083279708298031_1472922945432, "jQuery11230083279708298031_1472922945432" this is the function name in which response should be wrapped and sent back from the server side code.

http://localhost:8080/location?callback=jQuery11230083279708298031_1472922945432&_=1472922945433

Incase if custom callback method is defined in $.ajax method then jquery will send that method name in the "jsonpCallback" parameter. something like this. jsonpCallback:'handleResp' in the url call you can see the callback=handleResp is passed.

http://localhost:8080/location?callback=handleResp&_=1472922945433

To make the server side code support jsonp approach, following should be the logic on server side code. Sample code in java with spring. but this can be done in any framework with similar output.
@RequestMapping(value="/location", method=RequestMethod.GET)
public @ResponseBody String returnLocation(HttpServletRequest request){
 //reading callback paarameter
 String callback = request.getParameter("callback");
 StringBuilder sb=new StringBuilder();
//preparing response based on if callback parameter is present or not.
 if(callback!=null){
  //appending callback method name and adding json response inside that method.
 sb.append(callback).append("(").append("{\"location\":").append("BL").append("})");
 }else{
 sb.append("{\"location\":").append("BL").append("}");
 }
 return sb.toString();
}
following is the response from the server to the jsnop call.

  jQuery11230083279708298031_1472922945432({"location":"BL"})

 once the client browser receives the above response it calls back the success block of the $.ajax function and executes either "parseResp" or "parseErrorResp" method based on success or error.

that is all from jsonp.

Creating Exception Handler in Spring

In this blog i will show how to create Exception handler in Spring. I assume that you already have Spring application setup and it is running. Exception handling is one of the piece which gets ignored and in latter stages of the development it becomes unmanageable task. There will not be a consistent and common approach if it is not taken up at the beginning stages. Spring framework makes developers life pretty simple with the api which it provides for Exception handling at global/application level. Nice thing about this approach is that it becomes a single place for handling all the exception and becomes more manageable.

In this example i will be creating MyAppExceptionHandler. This will be single class which will be responsible for handling any exception scenario.

to start with create a class "MyAppExceptionHandler" this needs to implement an interface named "HandlerExceptionResolver" and "Ordered". Implement the default method which your IDE will ask you to implement.

Ensure that this class is annotated with @Component, otherwise spring will not recognize it as Bean component and it will not be loaded by framework. You can choose xml configuration as well instead of annotation.

Below is the method from "HandlerExceptionResolver" interface.
public ModelAndView resolveException(HttpServletRequest request, HttpServletResponse response,
 Object handler, Exception ex)
This method will handle the exception call from framework. It returns View, which can be a jsp file with custom error message. which will be shown to the user.

Following method from the interface Ordered
public int getOrder()
To manage the placement of exception handler implementation in queue, this method is usefull. If we use Integer.MIN_VALUE, it will put this class in front of the queue for resolving exceptions. If this method is not overrided then this class will not be the first class to be called for handling exception.

below is the sample class file example.

package com.sample.exception;

import javax.servlet.http.HttpServletRequest;
import javax.servlet.http.HttpServletResponse;

import org.springframework.core.Ordered;
import org.springframework.stereotype.Component;
import org.springframework.web.servlet.HandlerExceptionResolver;
import org.springframework.web.servlet.ModelAndView;

@Component
public class MyAppExceptionHandler implements HandlerExceptionResolver, Ordered{
 @Override
 public int getOrder(){
  return Integer.MIN_VALUE;
 }
 @Override
 public ModelAndView resolveException(HttpServletRequest request, HttpServletResponse response,
 Object handler, Exception ex){
  ModelAndView view;
  if(ex instanceof IOException){
   response.setStatus("500");
   view = new ModelAndView();
   view.addObject("message", ex.getMessage());
   view.setViewName("error");
  } else{
   response.setStatus("400");
   view = new ModelAndView("error")
   view.addObject("message",
     "Oops, Unknown Technical error has occurred.");
  }
  return view;
 }
}

error.jsp page code is as mentioned below.
<%@ taglib uri="http://java.sun.com/jsp/jstl/core" prefix="c"%>
<!DOCTYPE html>
<html>
<head>
<title>Error Page</title>
</head>
<body>
 <h1> ${message} </h1> 
</body>
</html>
error.jsp page code is as mentioned below.

That's it, now you are good to go. Thanks

Friday, September 2, 2016

Configure SonarQube with Jenkins

   Jenkins provides easy integration with different kinds of plugins which are helpful in overall improvement and management of development life cycle and code quality. One of such plugin is SonarQube.

    SonarQube is code quality analysis software. It runs through the code and identifies code quality issues. It has got web portal where you can generate different kinds of reports like

  1. Technical Debt
  2. Code Issue, with actual code linkage.
  3. Different types of reports.
  4. Maintains the history of issue details. Can check increase and decrease.
  5. Rules configuration.
  6. Quality Gates
  7. Code duplication
  8. and Many others.
    There is provision in Jenkins to integrate this plugin, which can be executed during the building of applications. Also there is option of failing the build process if the code quality does not match the defined quality gate in Sonar.

  Now i will show how to integrate this plugin with Jenkins. Assumption is that Jenkins is installed in your system. 

  To start first you need to download sonar server in your system or if it already installed and running then you can skip this step.

If Sonar is not installed then follow these steps.
  1. Download SonarQube from the link.
  2. After download, unzip the file in your system.
  3. Then to start SonarQube server, navigate to "SONAR_HOME/bin".
  4. Based on your environment, go to specific folder.
  5. I am using "windows-x86-64" as i am having Windows, 64Bit system. 
  6. Click on "StartSonar.bat" to start the sonar server.
  7. Sonar server should start, and you will see new command prompt window opening for you.
  8. Sonar can be added into window service as well if you are system admin. There batch files present in same folder.
  9. Access the SonarQube in WebBrowser by entering url: "http://localhost:9000/"
  10. Empty dashboard page of sonar server if it is fresh installation.
  11. Once page is launched, it means that sonar is installed and running fine.
  12. Please note this server url will be used in Jenkins when we install SonarQube plugin in coming sections below.
following message in the console tell if sonar server is up and running.
jvm 1    | 2016.08.30 23:02:43 INFO  app[o.s.p.m.Monitor] Process[web] is up


Now coming back to configuring SonarQube in Jenkins.

1. Access jenkins portal by accessing "http;//localhost:8080" url in browser.

2. Go to --> Manage Jenkins menu in left navigation. Then click on "Manage Plugins",


3. Navigate to "Available" Tab, in the "Filter" option, type "SonarQube", you will see "SonarQube Plugin" listed below, select the checkbox and click on "Download now and install after restart" button.


4. Following screen will be shown, restart Jenkins, plugin will be installed and it can be verified in installed Tab under Manage Plugin page.


5. After installation next step will configure SonarQube Plugin.

6. Navigate to "Manage Jenkins" --> "Configure System", look for section named "SonarQube", as shown below.

7. Provide basic  details, like Name, and Server Url, This URL should be the url for SonarQube Server which we installed above.


8. Once the global configuration is complete, next step will be to configure SonarQube for a specific projects. I will show next.

9. Navigate to Jenkins Home, by clicking on Jenkins menu in horizontal menu bar.

10. Next click on "New Item", you will get following screen, provide details of the project. Here we are creating new project which will be mapped to a java project.

  • Item Name
  • Select Freestyle Project
Click on OK button.


11. It will launch detailed project screen, where project related information can be configured, like SCM, and other configuration. These points is out of scope of this blog.

12. Now to add Sonar configuration to the project, click on "Add Build Step" and click on "Invoke Standalone SonarQube Analysis" menu. it will expand a new section specific to SonarQube configuration.


13. Provide the details for project configuration related to sonar server.

Values inside "Analysis properties" are important for sonar server.

  • sonar.projectKey - This will be used to uniquely identify project in sonar server, ensure that this does not repeat if you have multiple project in Sonar Server. Otherwise it will override the project data.
  • sonar.projectName - Project will be given in sonar server.
  • sonar.projectVersion - Usefull in maintaining history of the changes.
  • sonar.sources - folder where source code files are present.
  • sonar.language- language of the source code.


14. Once values are entered, then click on "Save" button.
15.  Now setup is complete for the project.
16. Next is to start Build process and verify if sonarqube analysis is getting triggered or not. Click on "Build Now" in project left navigation.


17. Once build starts, then monitor the logs in Jenkins console. You will see following logs. this mean SonarQube analysis is getting triggered and it is getting tracked in sonar server also.


18. To check project in SonarQube server, navigate with following link given in above console. you will see below screen.


That is all which needs to be done for configuring sonarqube in jenkins.

Thursday, September 1, 2016

Enable CSRF in Spring Security

In this blog I will show you steps which is needs to enable CSRF in spring application.

CSRF mean "Cross Site Request Forgery". If your application is vulnerable to this security issue, then it will allow malicious user to submit the forged/malicious request to the application and successfully completes it. Check OWASP Website page for detailed understanding about CSRF.

Enabling CSRF will not allow submitting forged request and do the transaction. This happens with CSRF token value which is submitted with all the request. It is difficult for malicious user to guess this value and submit with the request. CSRF token is autogenerated value which keeps changing. Also a reference of that token is maintained on server side for identifying valid request.

Please note i am using spring 4.x version for this blog.

Step1: 
Open web.xml file in WEB-INF folder, and add following line. 
<filter>
 <filter-name>securityFilterChain</filter-name>
 <filter-class>org.springframework.web.filter.DelegatingFilterProxy
 </filter-class>
</filter>
<filter-mapping>
 <filter-name>securityFilterChain</filter-name>
 <url-pattern>/*</url-pattern>
</filter-mapping>

Here  /* in url-pattern means that all the url patterns will be covered.

Step2: In this step we will do changes in applicationContext.xml, which contains security configuration details. Add below code to enable,

<security:http auto-config="true" use-expressions="true">
<security:access-denied-handler  error-page="/htm/denied.html" />
<security:form-login 
    login-page="/login" 
 authentication-failure-url="/login" 
 username-parameter="UserName"
 password-parameter="Password" />
<security:csrf  disabled="false"/>
</security:http>

Incase if you already having http tag then you need to add  <security:csrf disabled="false"/> . By default csrf is enabled so it is not required to add "disabled=false" attribute.  I added as it is easy to understand.

Adding csrf will inform spring to provide application necessary setup to use csrf while submitting request.

Basically anything action which changes the state in application should be covered. Generally GET method is not used for any changes in application data. But incase if your application uses GET for change operation then that also should be covered.

Incase if you need to specify methods/url's which should be scanned by spring for CSRF, then use following "request-matcher-ref" attribute of csrf tag. I will not covering this here in this blog.

<security:csrf  disabled="false" request-matcher-ref="ref of class"/>

hello
In the JSP page add following code in the form.

<input name="${_csrf.parameterName}" type="hidden" value="${_csrf.token}" />

This will generate a tag for CSRF and spring will take care of verifying the token for the submitted request. Token value can be passed either by hidden field or as URL parameter.

Following value will be visible in view source of page, if you are able to generate the CSRF token.


If the token is invalid then spring will throw invalid CSRF token was sent and will take user to error page. Application will throw "InvalidCsrfTokenException".

Note, if you using AJAX with Json parameter, then you can submit CSRF token as http parameter, you need to use either meta tags to pass this information to the application. As shown below.

    <meta name="_csrf" content="${_csrf.token}"/>
    <meta name="_csrf_header" content="${_csrf.headerName}"/>
Or include it all the ajax calls, by having below function in the jsp or view file.
$(function () {
    var token = $("meta[name='_csrf']").attr("content");
    var header = $("meta[name='_csrf_header']").attr("content");
    $(document).ajaxSend(function(e, xhr, options) {
        xhr.setRequestHeader(header, token);
    });
});
That is all on CSRF front.

Components of Big Data - Hadoop System

In this blog i will explain important components which are part of Hadoop System. I will give very brief overview of these components. Be...